Week 1 Tutorial: Python, VSCode, Git, and GitHub
Introduction/Objectives
Welcome to your first CS101 tutorial! Today is an exciting day because you’ll be setting up your professional programming environment and writing your very first lines of code. The tools and skills you learn today—writing code, running it, and saving your work—are the absolute fundamentals of software development.
In this session, we will bridge the gap between theory and practice. You’ll move from talking about programming to actually doing it. By the end of this tutorial, you will be able to:
- Install and set up a complete Python development environment using Visual Studio Code (VSCode).
- Write, save, and execute a simple Python program.
- Use the
print()function to display information and theinput()function to interact with a user. - Use the Git version control system to track changes to your code locally.
- Use GitHub to back up your code online and share your work.
Prerequisites
This is your first practical session, so there are no coding prerequisites! You just need to have:
- Attended the first week’s lecture on the basics of programming.
- Access to a computer with administrator privileges for installing software.
Core Content: Setup and First Program
Topic 1: Introduction to VSCode (Your Digital Workbench)
Concept Explanation
Think of writing a program like building something with wood. You need a workbench, tools like a saw and a hammer, and the wood itself. In programming, our “workbench” is an Integrated Development Environment (IDE). An IDE is a special application that bundles together all the essential tools for programming.
For this course, we’ll use Visual Studio Code (VSCode). It’s a powerful and popular IDE that includes:
- A Text Editor: A place to write and edit your code.
- An Integrated Terminal: A command-line interface to run your programs directly from the editor.
- Extensions: Add-ons that give VSCode new features, like enhanced support for Python.
Instructions: Step-by-Step Setup
Part A: Install Python
- Go to the official Python website: python.org/downloads/
- Download the latest stable version of Python 3.
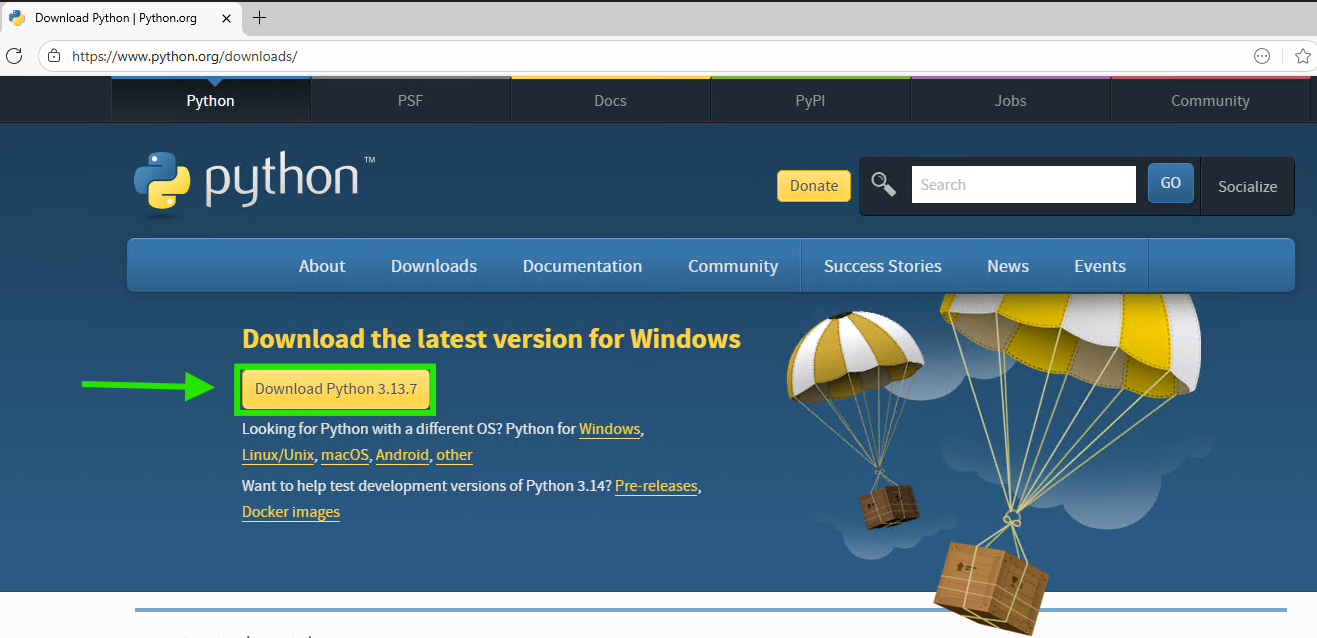
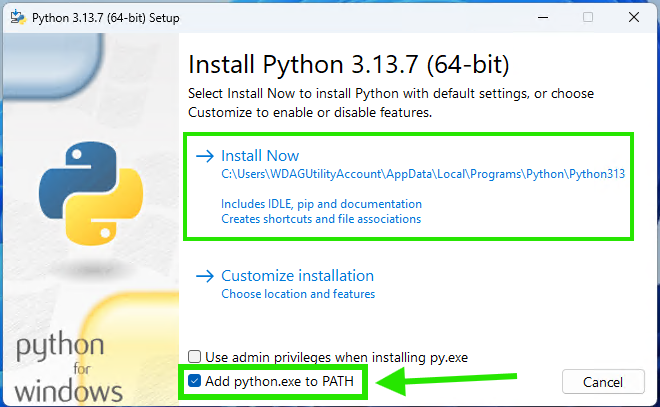
- Run the installer. Crucial Step for Windows Users: On the first screen of the installer, make sure to check the box that says “Add Python to PATH”. This will allow you to run Python from your terminal easily. For macOS, the installer handles this for you.
- Follow the on-screen instructions to complete the installation.
- Finalize the Installation (Important for Windows): On the final “Setup was successful” screen, you will see an option to “Disable path length limit”.
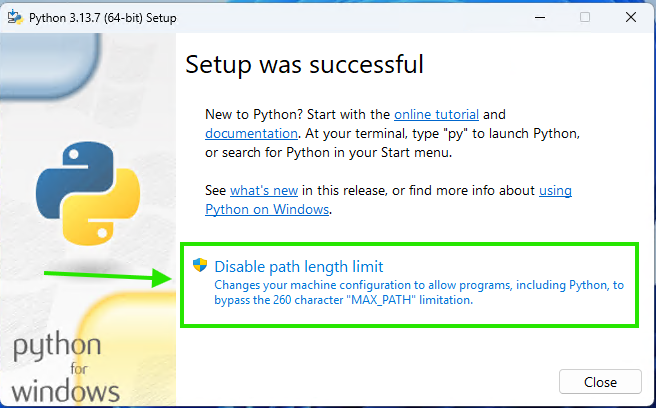
- What does this do? It removes an outdated Windows limitation on how long file paths can be (e.g.,
C:\Users\YourName\MyProject\...\some_file.py). This is a common source of confusing errors for developers. - Action: We strongly recommend you click this option. It’s a safe and beneficial change for programming. You may get an administrator confirmation pop-up; if so, click “Yes”.
- What does this do? It removes an outdated Windows limitation on how long file paths can be (e.g.,
- Once you’ve clicked that option, you can click “Close” to finish the installation.
Part B: Install Visual Studio Code
- Go to the official VSCode website: code.visualstudio.com
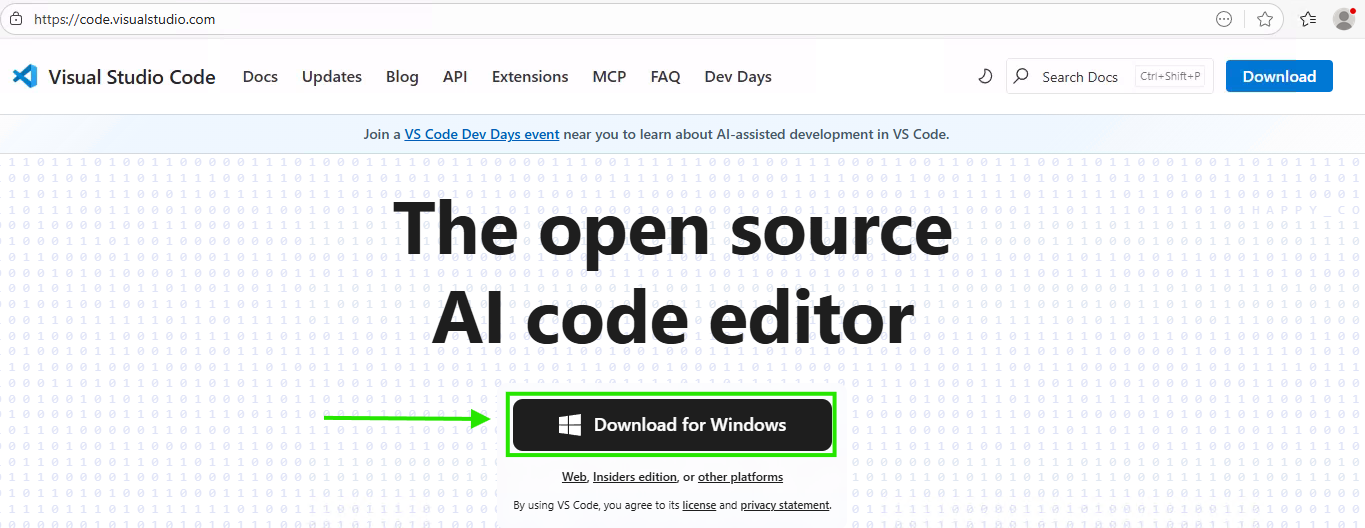
- Download the installer for your operating system (Windows, macOS, or Linux). By default, this will be the “User Installer” for your system, which is exactly what we want.
- Run the installer.
- macOS/Linux Users: Follow the on-screen instructions.
-
Windows Users: You might see a pop-up with a warning that says, “This User Installer is not meant to be run as an Administrator.”
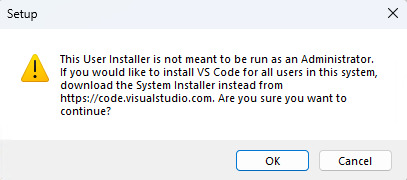
This is normal. The “User Installer” is designed to install VSCode only for your current user account without needing admin rights. Simply click OK to continue. You do not need the “System Installer” for this course.
- Accept the default settings and complete the installation.
Part C: Configure VSCode for Python
Part C: Configure VSCode for Python
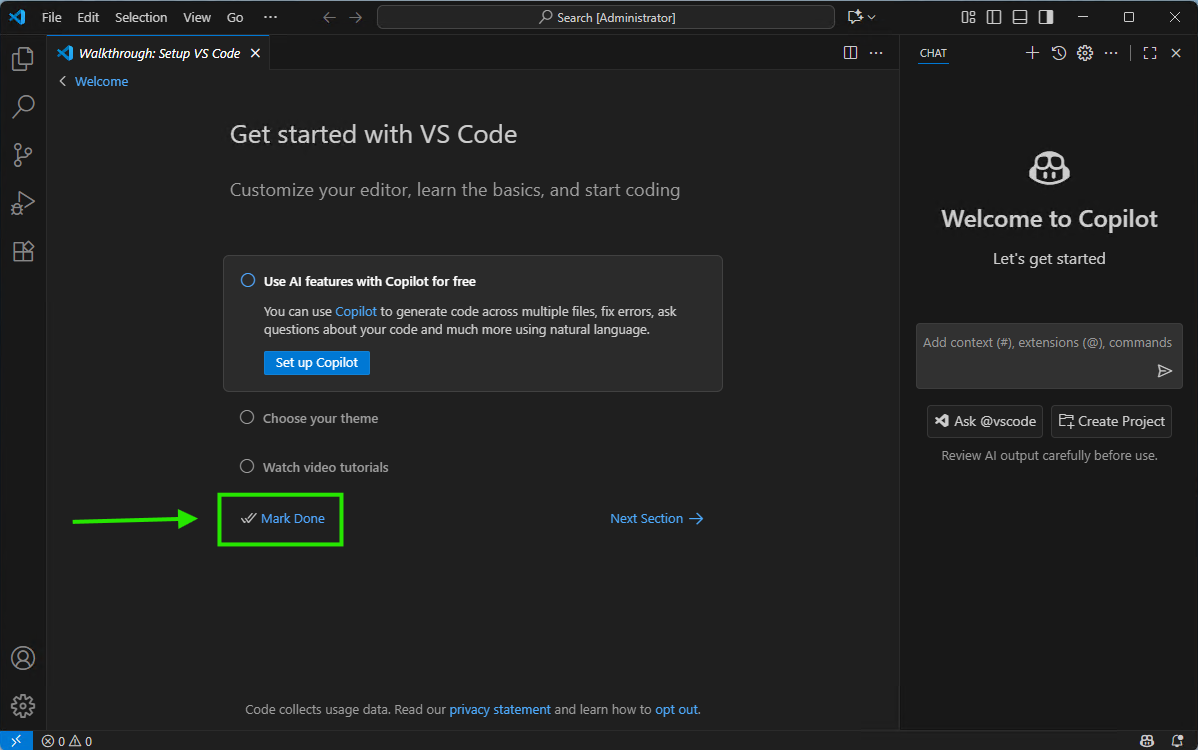
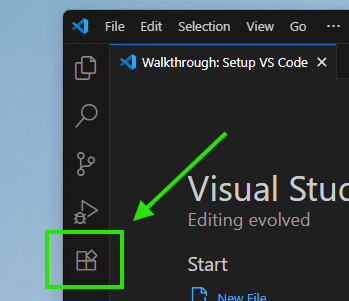
- Open VSCode. The first time you launch the application, you’ll be greeted with a “Get started with VS Code” welcome screen.
- Dismiss the Welcome Screen. To prevent this “Get Started” screen from appearing every time you open VSCode, look for the “Mark Done” link in the lower-left area of that central panel and click it. This tells VSCode you’ve completed the tour and gives you a clean workspace for all future sessions.
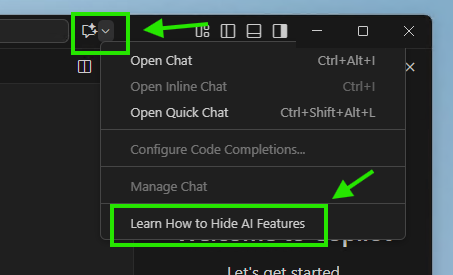
- Disable AI Features (Important for Learning). VSCode now includes a powerful AI assistant called GitHub Copilot. For a professional, this can be a great productivity tool. However, for someone learning to program, it can get in the way of developing fundamental problem-solving skills. We will use a single setting to disable and hide all of these features.
- In the top right corner of the VSCode window, find the Chat icon. Click on it to open a menu. From that menu, select the option “Learn How to Hide AI Features”.
- This will automatically open the Settings tab and take you to the correct option. Find the setting named “Chat: Disable AI Features” and check the box next to it.
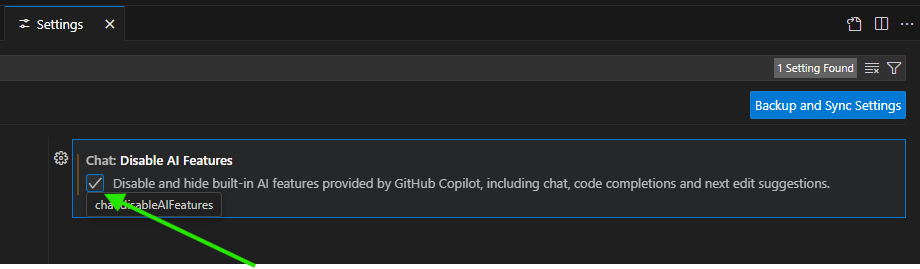
- This single action will disable and hide all built-in AI features, including chat, code completions, and suggestions. You can now close the “Settings” tab.
- In the top right corner of the VSCode window, find the Chat icon. Click on it to open a menu. From that menu, select the option “Learn How to Hide AI Features”.
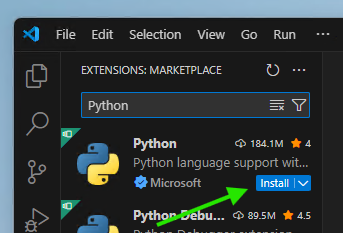
- Install the Python Extension. Now that our environment is clean and ready for learning, let’s install the tools for Python.
- Look for the Extensions icon on the left-hand sidebar (it looks like four squares). Click on it.
- In the search bar that appears, type
Python. - Find the extension named “Python” published by Microsoft. It will be the first and most popular result. Click the blue Install button. This extension provides features like code highlighting and error checking.
- Look for the Extensions icon on the left-hand sidebar (it looks like four squares). Click on it.
Part D: Create Your First Project
- Create a Folder: On your computer (e.g., on your Desktop or in your Documents), create a new folder. Let’s name it
cs101_projects. This is where you will store all your work for this course.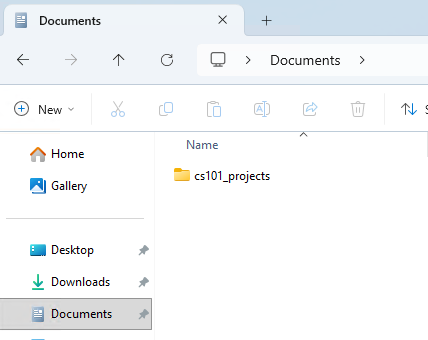
- Open the Folder in VSCode: In VSCode, go to the top menu and select
File > Open Folder.... Navigate to and select thecs101_projectsfolder you just created.
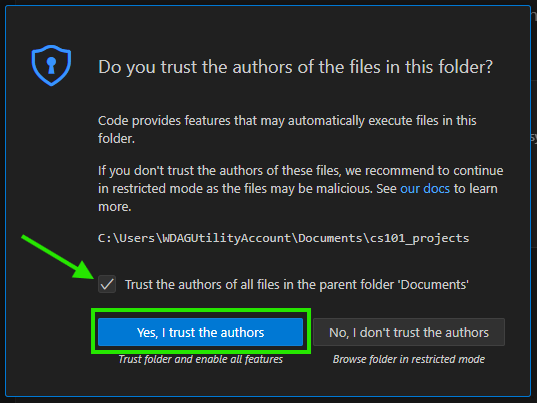
- Trust the Folder: The first time you open a folder, VSCode will show a security pop-up asking, “Do you trust the authors of the files in this folder?”.
- Why does this happen? This is a security feature to protect you from untrusted code you might download from the internet.
- What should you do? Since you created this folder yourself, it is completely safe. We need to tell VSCode to trust it so all features (like our Python tools) will work correctly.
- Action: Check the box that says “Trust the authors of all files in the parent folder…“ and then click the blue button “Yes, I trust the authors”. This is a convenient way to ensure you won’t be asked again for other projects you create in the same parent directory (like ‘Documents’).
- Create a Python File: In the Explorer view on the left side of VSCode, you should now see your
CS101_PROJECTSfolder. Right-click on it and selectNew File. Name your filehello.py. The.pyextension is essential—it tells VSCode and your computer that this is a Python file.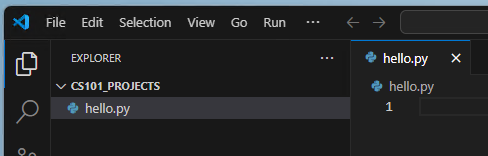
- Open the Terminal: Go to the top menu and select
Terminal > New Terminal. A panel will appear at the bottom of VSCode. This is your command line, where you will tell the computer to run your code. You are now fully set up and ready to code!
Topic 2: Writing and Running Your First Program
Concept Explanation
A program is simply a sequence of instructions that a computer follows. Our first instruction will be to tell the computer to display a message.
print(): This is a built-in Python function that displays whatever you put inside its parentheses on the screen. Text data, which we call a string, must be enclosed in double quotes (") or single quotes (').input(): This is another function that allows your program to be interactive. It displays a message (a prompt) to the user and then waits for them to type something and pressEnter.
Code Example: The “Hello, World!” Program
This is the most traditional first program. It’s a simple sanity check to ensure your entire setup works correctly.
- In your
hello.pyfile, type the following code:
# This is a comment. Python ignores anything after a # symbol.
# This program will display a greeting on the screen.

print("Hello, World!")
-
Save the file (Ctrl+S or Cmd+S).
-
Run the program: In the VSCode terminal, make sure you are in your project directory. Then, type the following command and press
Enter:
python hello.py
(Note: On some systems, you may need to use python3 instead of python.)

- You should see the following output in your terminal:
Hello, World!
Congratulations, you’ve just written and executed your first Python program!
Activity: Making the Program Interactive
Now, let’s modify our program to greet the user by name. This combines both print() and input().
- Replace the code in
hello.pywith the following:
# This program asks for the user's name and then greets them.

# 1. Display a prompt asking the user for their name.
# The text the user types is stored in 'user_name'.
user_name = input("Please enter your name: ")

# 2. Display a personalized greeting using the stored name.
print("Hello, " + user_name + "! Welcome to CS101.")
-
Save the file and run it again from the terminal with
python hello.py. -
This time, the program will pause and wait for you. Type your name and press
Enter. The output will look something like this:
Please enter your name: Sukhrob
Hello, Sukhrob! Welcome to CS101.
Topic 3: Introduction to Git (Saving Your Progress Locally)
Concept Explanation
What is Git? Git is a Version Control System. Imagine you’re writing an important essay. You might save different versions like Essay_v1.doc, Essay_Final.doc, Essay_Final_with_corrections.doc. Git does this for your code, but in a much more powerful and organized way.
It acts as a safety net for your work on your local machine. It allows you to:
- Save snapshots (called “commits”) of your code at any time.
- Track every change you make.
- Revert to previous versions if you make a mistake.
Instructions and Setup
1. Install Git The installation process depends on your operating system.
- For Windows:
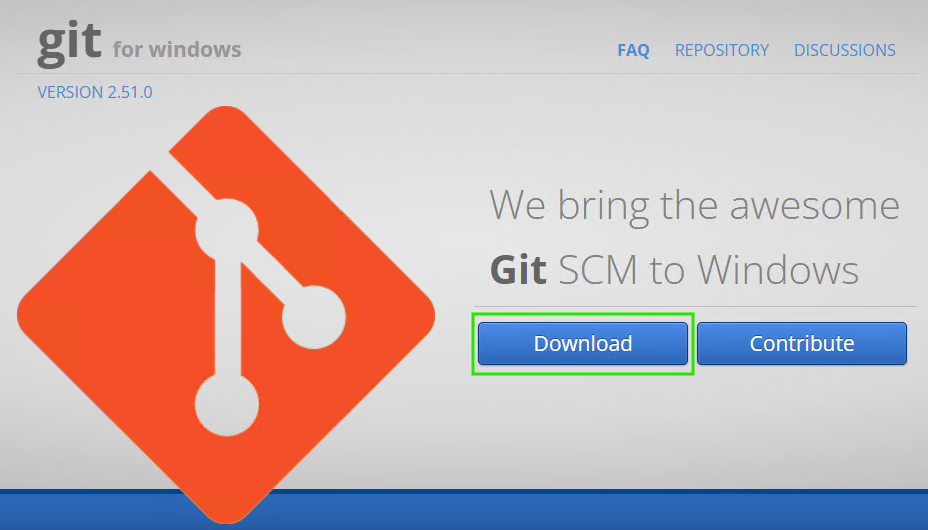
- The recommended installer is Git for Windows. Go to: https://gitforwindows.org/
- If that site is down, you can use the official Git website as a backup: https://git-scm.com/download/win
- Download the installer and run it. Accepting all the default settings during installation is perfectly fine.
2. Configure Git
- Open a new terminal in VS Code.
- You need to tell Git who you are. This information will be attached to every change you save. Run the following two commands, replacing the placeholder text with your actual name and email.
git config --global user.name "Your Name"
git config --global user.email "youremail@example.com"

Part C: Create a Repository for Your Program
Let’s save your hello.py program using Git.
- Initialize the Repository: In the VSCode terminal, make sure you are inside your
cs101_projectsfolder. Then, type:
git init
You will see a message like Initialized empty Git repository in .... This creates a hidden .git subfolder where Git will store all its tracking information.
- Add Your File: Next, tell Git you want to track the
hello.pyfile.
git add hello.py
This moves the file to the “staging area,” ready for the next commit. Nothing is permanently saved yet.
- Commit Your Changes: Finally, save your snapshot with a descriptive message.
git commit -m "Initial commit: Create interactive hello world program"
You will see output confirming that 1 file has been changed. You have now successfully saved your first version of the project!
Topic 4: Introduction to GitHub (Sharing and Backing Up Your Work)
Concept Explanation
We’ve used Git to save our work on our own computer. But what if our computer is lost or damaged? Or what if we want to share our code with a classmate or a future employer?
This is where GitHub comes in. GitHub is a website and cloud service that works with Git. Think of it like this:
- Git is the software that tracks changes on your machine (your local history).
- GitHub is the online platform where you store a copy of your project and its history (a remote backup).
The workflow is: work on your files, add and commit them locally with Git, and then push those commits to GitHub to back them up.
Instructions: Step-by-Step Setup and First Push
Part A: Create a GitHub Account
- Go to github.com and sign up for a free account.
Part B: Create a New Repository on GitHub
- Once logged in, click the
+icon in the top-right corner and select “New repository”.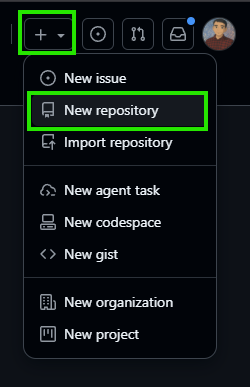
- Give your repository a name. It’s good practice to match your local folder name, so let’s call it
cs101_projects. - Provide a short description (optional).
- Select “Public” so that your instructors and TAs can see your work.
- Crucially, DO NOT check any of the boxes to “Initialize this repository with a README”, “.gitignore”, or “license”. We already have a project locally, and we want to push it to a completely empty repository.
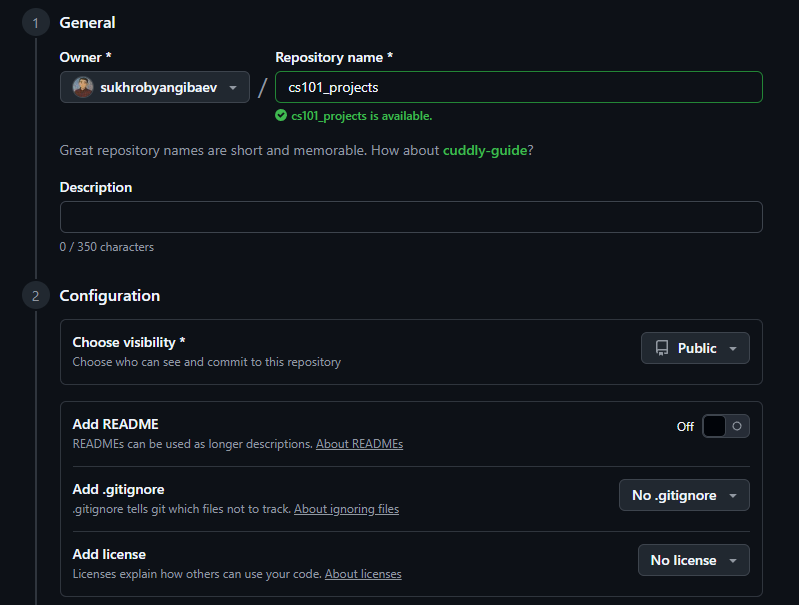
- Click “Create repository”.
Part C: Link Your Local Repo to GitHub GitHub will now show you a page with some commands. We want the section titled “…or push an existing repository from the command line”.
- Connect Local to Remote: Copy the first command from that page and run it in your VSCode terminal. It will look like this, but with your username:
git remote add origin https://github.com/YourUsername/cs101_projects.git
This command tells your local Git repository that there is a remote location named origin at the provided URL.
- Push Your Code and Verify the Connection: Now, upload your committed code to GitHub for the first time.
git push -u origin master
- Log in to GitHub: After you approve the connection, you will likely be prompted to log in. A browser window may open, asking you to authorize VSCode to access your GitHub account. Follow the on-screen instructions to sign in and grant access.
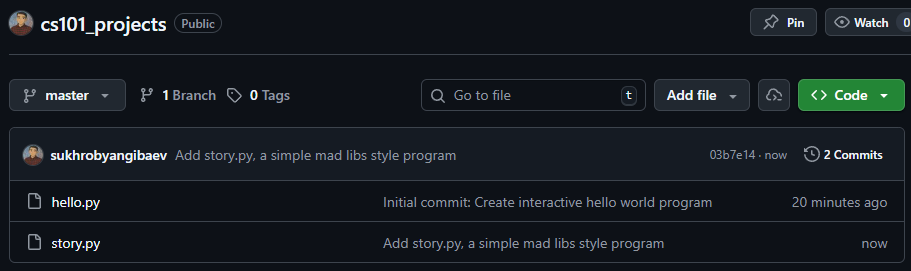
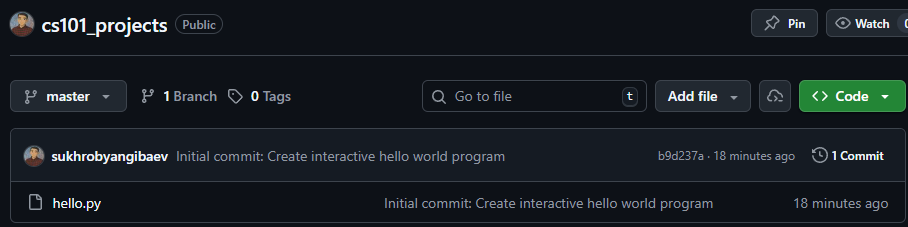 Congratulations! If you refresh your GitHub repository page, you will now see your
 hello.pyfile. Your code is safely backed up online.
Putting It All Together
Let’s create a new, slightly more complex program and use the full Git and GitHub workflow.
- Create a new file in VSCode named
story.py. - Write the code for a simple story-generator:
# A simple story generator program.

print("Let's write a story! Please provide some words.")

# Get words from the user
adjective = input("Enter an adjective: ")
noun = input("Enter a noun: ")
verb_past_tense = input("Enter a verb (past tense): ")

# Print the story
print("\nHere is your story:")
print("The " + adjective + " " + noun + " " + verb_past_tense + " over the lazy dog.")
- Save and run the program (
python story.py) to make sure it works. - Save your work with Git and push to GitHub:
# Step 1: Add the new file to the staging area
git add story.py

# Step 2: Commit the staged file with a descriptive message
git commit -m "Add story.py, a simple mad libs style program"

# Step 3: Push your new commit to your GitHub repository
git push
Now check your GitHub page again. The story.py file is there!
Practice Exercises
- Personal Introduction: Write a program named
intro.pythat prints three separate lines about you: your name, your major, and your favorite hobby. - Simple Calculator: Write a program named
add.py. It should ask the user for a first number, then a second number. Finally, it should print a message like “The sum of your numbers is [result]”. Hint: Theinput()function gives you text. You might see an unexpected result! We will learn how to fix this next week, but for now, just observe what happens when you “add” two pieces of text together. - Commit Your Exercises: After completing exercises 1 and 2, use Git to commit your new files (
intro.pyandadd.py). You can add them both with oneaddcommand (git add intro.py add.py) and then commit them with a single, clear message. Finally, push your changes to your GitHub repository.
Solutions Gate
Solutions are hidden. Enter the password to view.
Solutions
Exercise 1
# intro.py
# This program prints a personal introduction.

print("Name: Jane Doe")
print("Major: Computer Science")
print("Favorite Hobby: Hiking")
Exercise 2
# add.py
# This program asks for two numbers and displays them.

print("--- Simple Number Concatenator ---")

# Get input from the user
first_number_text = input("Enter the first number: ")
second_number_text = input("Enter the second number: ")

# "Add" the text together (this is called concatenation)
result = first_number_text + second_number_text

# Display the result
print("The 'sum' of your numbers is " + result)
print("(Note: The numbers were joined as text, not mathematically added!)")

# Example Run:
# Enter the first number: 5
# Enter the second number: 10
# The 'sum' of your numbers is 510
Exercise 3
# In the terminal, after creating and saving both intro.py and add.py

# Step 1: Add both new files to the staging area
git add intro.py add.py

# Step 2: Commit the staged files with a descriptive message
git commit -m "Complete week 1 exercises: intro and add programs"

# Step 3: Push the commit to GitHub
git push
Common Pitfalls & Best Practices
- Forgetting to Save: A very common mistake is to change your code but forget to save the file (Ctrl+S or Cmd+S) before running it in the terminal. You’ll be running the old version and won’t see your changes!
- Typos in the Terminal: File names and commands are case-sensitive.
python Hello.pywill not work if your file is namedhello.py. - Unhelpful Git Messages: Avoid commit messages like “update” or “stuff”. Your future self (and your teammates) will thank you for clear messages like “Fix bug in user greeting” or “Add program to calculate area.”
- Forgetting to Push: A very common issue! Your work is saved locally with
git commit, but until you rungit push, it is not backed up on GitHub. If your TA needs to see your work, they won’t be able to until you push. - Syntax Errors: Forgetting a closing parenthesis
)or a quote"in yourprint()statement will cause an error. Read the error messages carefully—they often tell you exactly where the problem is.
Summary / Key Takeaways
- VSCode is our IDE, a tool for writing, editing, and running code.
- We write Python code in files with a
.pyextension. - We execute Python scripts from the terminal using the command
python filename.py. - The
print()function is used to display output to the user. - The
input()function is used to get text from the user, making programs interactive. - Git is a version control system used to track changes to our code locally.
- The fundamental Git workflow is
git init(once), followed by a cycle ofgit addandgit commit. - GitHub is a platform for hosting our Git repositories remotely, allowing for backup and collaboration.
- We use
git pushto upload our local commits to our GitHub repository.
How to log out from GitHub on Windows (clear saved credentials)
If you signed in to GitHub during the push step and want to switch accounts or force Git to ask for login again, clear the saved credentials on Windows and (optionally) sign out in VS Code.
1) Sign out in VS Code (optional but recommended)
- In VS Code, click the Accounts icon (bottom-left) > Manage Accounts.
- Under GitHub, click Sign out and confirm.
2) Remove saved credentials from Windows Credential Manager
- Close VS Code and any terminals using Git.
- Open Control Panel > User Accounts > Credential Manager.
- Choose Windows Credentials, then open the Generic Credentials section.
- Find entries related to GitHub, commonly named:
- git:https://github.com
- github.com (or entries that mention GitHub/Git Credential Manager)
- Click each GitHub-related entry, then click Remove.
3) Verify it worked
- Reopen your project and in the terminal run a Git command that talks to GitHub (for example,
git push). You should be prompted to sign in again. Follow the browser flow to authenticate with the correct account.
Notes
- Clearing credentials affects all repositories on this Windows user account; you’ll re-authenticate the next time you access GitHub over HTTPS.
- If you use GitHub Desktop or other tools, sign out there as well if needed. If you use SSH keys instead of HTTPS, revoke/replace keys in your GitHub account settings.
This content will be available starting October 02, 2025.